 |
| Teeny, perfect tomato seeds, full of promise and ready for planting. |
My tomatoes are germinating!
That's right - as previously mentioned, mid-March is optimal tomato-seeding time, and I did just that. Now the results are popping up from the soil surface, and my garden is beginning to become a reality before my eyes. Are you in on this awesome action? Well, this post will show you how to get it done. Don't worry if you haven't started yet - it's not too late! Follow along in the steps below, and feel free to drop me a line if ever you have questions. Plus, the FREE SEEDS offer still stands. If you need some seeds to get you growin, just send me an e-mail and I'll mail them to you right away! Ready? Let's grow!
1) Gear Up!
As listed in my last post, get yourself outfitted with some basic essentials, including a tray or some pots, a growing medium like seed-starting soil, seeds, and a source of light.
2) Get organized.
 |
| Your own notes make a helpful tool. |
 |
| Seed packages are full of useful info. |
 |
| Group 'like' plants together, and don't forget to label! |
3) Fill your containers with soil.
 I'm
using biodegradable trays and commercially-prepared seed-starting mix.
In order to give my seeds a little bit of an extra boost, I've also
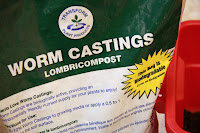
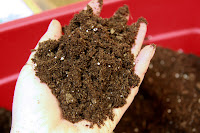
mixed in some worm castings at a ratio of about 1:3. Worm castings boast
some serious benefits - they offer nutrition to young seedlings, making
them an ideal natural fertilizer, but they also are touted to help
protect seedlings from fungal diseases and have even been credited with
aiding in faster seed germination. They're purely optional, and this will actually be my first time mixing them in with my seed-starting medium.
  I use a small plastic bin for mixing, and I think it's best to slightly
moisten the soil as you mix. Try to gently break up any clumps or
bumps, and simply drop handfuls into your pot or tray. Fill it up to
the top, and tap the tray on the floor or table to encourage the mix to
settle in and close up big gaps. Top off the surface so that it's
relatively level, and gently smooth with your hand. Ta da!! You're
ready to start sowin'!
I use a small plastic bin for mixing, and I think it's best to slightly
moisten the soil as you mix. Try to gently break up any clumps or
bumps, and simply drop handfuls into your pot or tray. Fill it up to
the top, and tap the tray on the floor or table to encourage the mix to
settle in and close up big gaps. Top off the surface so that it's
relatively level, and gently smooth with your hand. Ta da!! You're
ready to start sowin'!4) Sow your seeds!
 |
| Sow multiple seeds per cell to help ensure a viable plant. |
 |
| Planted, labeled and ready to grow! |
5) Water them in - carefully!
Water is crucial to the successful germination of your seeds. When your planting is complete, you want to water the soil so that it's damp, but not wet. The seeds will need to stay consistently moist and warm in order for their little coats to break open and for their internal mechanisms to trigger growth. I water my newly-planted seeds with warm water, gently delivered with a watering can that has small holes. Other options include using a spray bottle, or carefully pouring from a cup or jar. Just don't wash your little babies away! Many growers advocate for bottom-watering - add water to a tray or dish beneath the seedlings, allowing the water to be drawn up through osmosis, which avoids disturbing the soil on the surface. I opt to water them gently from above at first, then switch to bottom-watering once the plants are established. The choice is yours!
6) Cover up!
When your seeds are planted and watered, you can hurry them along and help to keep them toasty and moist by covering them with a clear plastic dome. Mine came included with my tray kit, but you can also substitute with a clear baking tray or plastic wrap. You'll keep the tray on until the seeds germinate.
7) Lights and action!
 |
| Supplemental light from fluorescent fixtures is helpful. |
So... ready to try it?? Please drop in and let me know how your growing is going, and stay tuned for updates on this season's crop as I go from seed, to garden, to harvest. I can't wait to share another season of Mo Farm adventures with you! Happy sowing!


Kris, looks like you are well on your way to having a successful garden this year. I am planning to start plants next year. This year I will just buy my plants from the local nursery which isn't all that much for my garden size.
ReplyDeleteHave a great spring seed starting day.